top of page
Ivory and Ash Grey Photo DIY Influencer
  • Instagram
  • Facebook
  • Pinterest
wheelbarrow2_edited.jpg
sheep2_edited.jpg
bedroom8.png
lambs.png
newyear1.jpg

Updated: Aug 9, 2020


This blog post is way overdue, but life has been happening at lightening speed! Whew! I know there are no excuses...but things have seriously been so busy. In between the craziness, The Mister and I did find time to remodel our 1970 master bathroom (it came with blue carpet) this past spring. I’ve waited eleven years to do this project and it finally happened! I couldn't be more excited to share it with you guys...

The main inspiration for the bathroom came from our collaboration with @sinkology and their stunning copper sinks & faucets. I really wanted something that would still maintain the feel of our 1820’s farmhouse, but update it and give it some character. Hunting to two vintage dressers to convert into vanities was A TRIP, let me tell you. I searched long and hard for the pieces that would be just right in the space. One day I stumbled across not one, but two, identical (!) dressers that I instantly fell in love with.

The beauty in the mess! LOL!

I convinced my amazing dad, one of the most talented woodworkers on the planet, to help convert the each of the drawers to allow a new drop-in sink to fit into the dresser while maintaining the storage in the three drawers below. We ended up with a nice bit of space for toiletries and storage.

While my dad was working on the dressers, Mr. Maple Creek was patching the walls and laying a new floor from @Lowes. We decided to go with a laminate floor that blended with the rest of the wood floors in the farmhouse. For the paint color on the walls, I chose a bright white paint from @sherwinwilliams to give the space fresh, clean feel. It was so nice to see the previously-tan walls transform!

When the vanities finally arrived I gave them a fresh coat of white chalk paint from Kilz with a dark wax coat over top, and then it was installation time. We had finally reached the point in the makeover where we could install the vanities and put everything in place! To say I was doing a happy dance is an understatement.

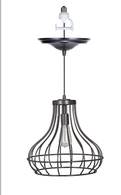
For the finishing touches to the space I worked with @1stoplighting to give the lights a new look. It was hard to decide what would look good with the space, since they have so many to choose from. I reached out to their amazing customer service team for help and advice, and they pointed me in the right direction. The mirrors also needed an update, so I went with two that I found from @kirklands.

Overall, I'm so glad I decided to stick with the plan of reinventing vintage dressers into vanities. It ended up being such a fun project and a great way to recycle old furniture for a new purpose! Let me know in the comments, or on Instagram: what's your latest DIY project? Have you ever tried to rework an old piece of furniture for a new purpose? Any ideas for what I should tackle next?

If you’ve followed along with me on this journey thank you so much for all of the love and encouragement during the whole process. Y’all made us keep on keeping on!

Updated: Aug 9, 2020


Have you ever found a piece of furniture you absolutely love that just needs a little TLC? That’s how I felt when I saw this gorgeous side table at a vintage sale. I think it was love at first sight! The price was outstanding – under $100. Ladies, if you’re hunting to a great bargain, barn sales & flea markets are the way to go.

I had THE perfect spot for the side table all picked out in the farmhouse. At first, I wanted to paint it. But when I thought about the beautiful wood that was (hopefully!) hiding under the varnish, I knew I wanted to see if I could bring back its natural beauty.

Below, see how I took a great vintage find from a 5 to a 10, with just a little elbow grease & a heart to see it restored!

STEP one: Remove doors & drawers

To effectively remove all paint and lacquer from ALL sides of the doors and drawers, I first took out the drawers and doors, and set the separate pieces out to be worked on.

Even if the paint isn't visible, it's important to clean off the nooks and crannies so that your piece is as beautiful and close-to-original as possible.

STEP Two: Plastic wrap

I covered the piece with Citristrip varnish remover and covered it in plastic wrap. The plastic helps keep the varnish moist, so that the chemical begins to peel the paint away from the wood more effectively.

STEP Three: Paint removal

Scrape down all remaining paint and wipe down with denatured alcohol with steel wool...

I HIGHLY recommend wearing gloves! My skin gets so dry and cracked from the dry winter air, and I try to save it as much “extra” irritation as possible when tackling a DIY project.

...this will help reveal that fantastic, shining wood underneath!

STEP Four: Sand

Sand off any imperfections (I just use Walmart-grade sandpaper; whatever you have on hand will work. If needed, you can repeat steps two through four.

STEP FIVE: Linseed

Wipe down with linseed oil (this one works great) - the oil helps bring out the natural texture and grain in the wood. Put in the work to add that fabulous new-find glow to the piece!

STEP Six: top coat

Cost with a top polyurethane coat (I recommend this brand). I used a flat finish because I wanted it to look vintage.

And you're done! Enjoy your beautiful side table and the vintage flair it adds to your space. Have YOU planned a weekend DIY, friends? Let me know if you try this tutorial in the comments, or via Instagram, @maplecreekmarket! Happy Friday!

Blessings,

Ginny

Shop the side table details!

Cake (Everything Dawn), Wooden sign (Currently Chic), Cake stand (Pioneer Woman)


“Where the home is, the heart is.

Our kitchen is the heart of our home. It’s a hub of noise, community, and activity, a gathering place for family and friends alike, which is why it’s so important to have a space that’s both functional and welcoming.

In the 80s, our little farmhouse kitchen underwent a makeover – it was gutted & refurbished with dark cabinets and paneling, with just one window for light. Yikes! If you have followed me for any length of time, then you KNOW the house has been a work in progress.

Some things just need a little extra TLC.

Our solution? We tackled the cabinets by sanding, painting and repairing them to bring some of the vintage country charm back to the farmhouse. No dark woodwork or closed spaces here!

One of the first (and most important) things we did was install recess lighting, which I dearly love, because it helped brighten the space. Despite this, I wanted another solution to give the kitchen that extra bit of warmth over the island we made. (Another vintage find and long DIY project – a story for another day!

I began to search for options that would best fit the aesthetic of our farmhouse...

After scouring numerous home improvement stores for lighting options, to little success, I discovered an amazing find – a company called Worth Home Products. They sold lights that converted recess lighting into pendant lighting.

Imagine my excitement!

I set to work searching for the best option to fit my farmhouse kitchen. When I had questions, I called the company and they were so kind and helpful. I even managed to speak with the wonderful owner, Lori. I was so impressed with her customer service and interest in our home and project!

She offered many options for changing the lighting, and I was glad to have had the chance to get her input on what would work best.

After ordering two of the Brushed Bronze Recessed lights, it was installation time.

When they came I was thrilled to discover I could hang them myself.

Here’s How I Did It:

Step One: Remove the current light bulb.

Step Two: Screw in the new pendant light and slide up the decorative canopy.

Step Three: Step back and enjoy!

Now our cozy little kitchen space feels even more like home. It’s so nice to gather under the lights, and to have a more functional, well-lit room for entertaining guests.

Interested in trying Worth Lighting for your space? Here are my top picks for a vintage farmhouse: (ALL instant pendant style & a breeze to install!)

Left to Right:

Recent Posts

Closing.JPG
Life's sweeter with community. Let's be
sheep5_edited.jpg
  • Instagram
  • Facebook
  • Pinterest
IMG_3939.JPG

Looking to Collaborate? 

DESIGNED BY MCCOWAN MARKETING

EST. 2017 | 2020

BE A LIGHT, SHINE BRIGHT

bottom of page